 |
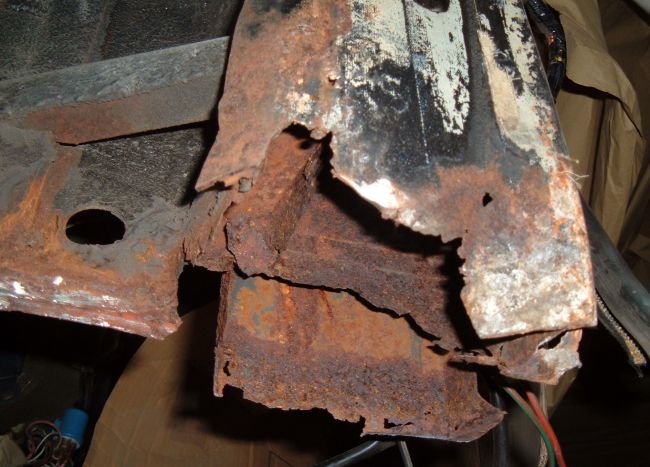
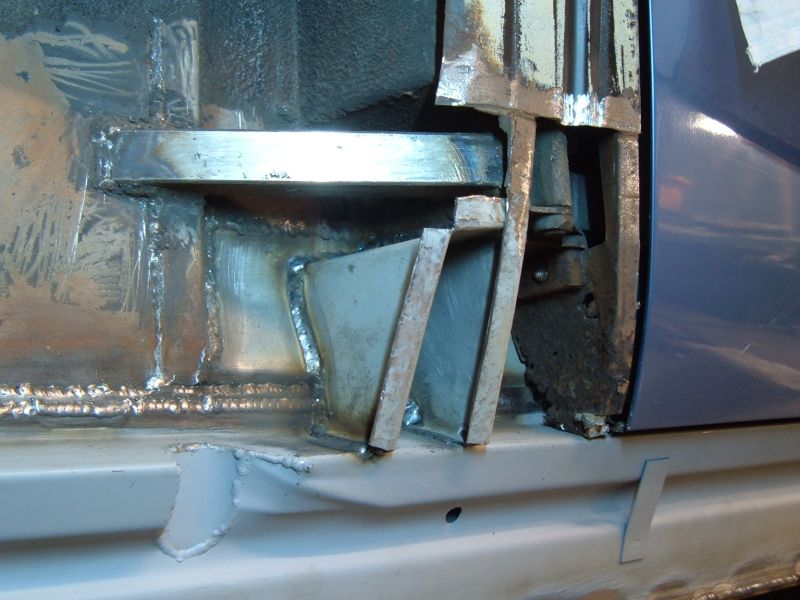
The A Pillar structure is impressively complicated. The basic structure is a box section reinforced by two hinge boxes, the bottom of the lower one being visible in the photograph. The box section was connected to the inner sill by a buttress (at the very bottom of the photograph) and further reinforced by a second buttress to the left of the photograph. Finally, the hinge box was connected to a further piece of chassis by the square tube to the far left. |
 |
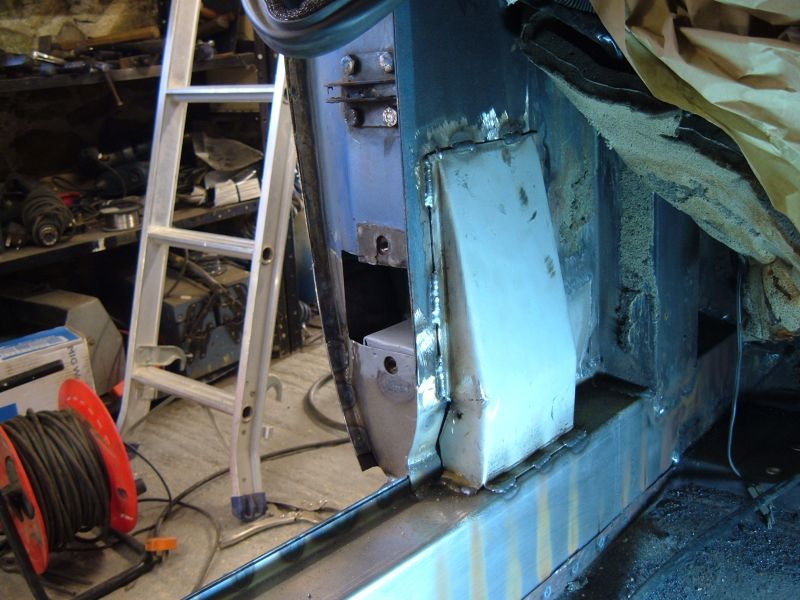
Unfortunately, none of this structure extended anywhere near the sill (well, perhaps it once did). The A-Pillar needed to be cut back as far as the hinge box which thankfully had survived intact. The rear face of the A-pillar was left in place to guide alignment of the new sill. |
 |
Only the inner repair could be carried out at this stage. The outer A-pillar panels would have to wait until after the outer sill had been fitted. |
 |
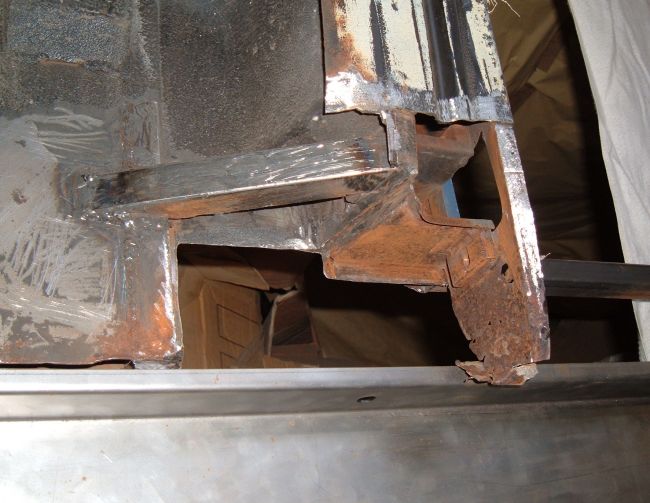
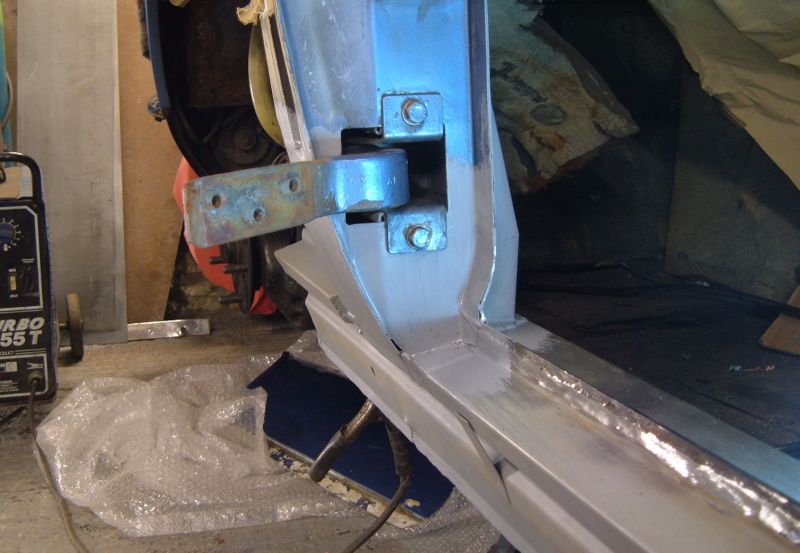
The sills were fitted prior to any further work on the B-pillar. The square tube that reinforces the B-pillar to a second chassis member is an excellent idea from Aston Martin. It added so much stiffness to the B-Pillar that it was possible to hang the doors despite the absence of any other real structure in the area. |
 |
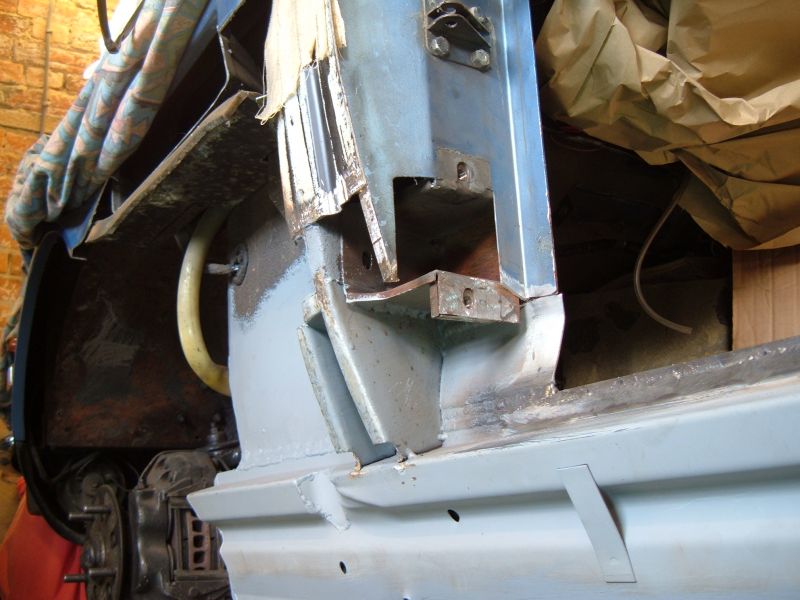
There appeared to be the remains of an inner A-pillar reinforcement in the original structure, although the area had rusted so completely it is difficult to be certain. In any case, a section between the hinge box and the sill would have been logical from a structural point of view and was added at this stage. |
 |
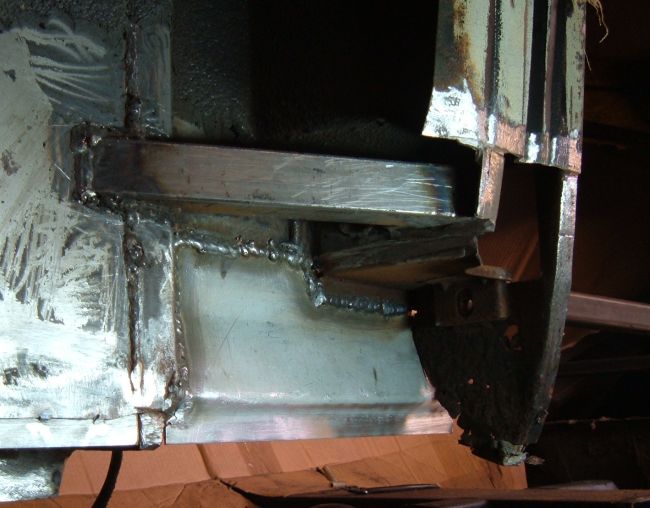
A buttress (more obviously present in the original structure) was added forward of the A-pillar. This completed the forward section of the A-pillar, although the rearward section would still need to be replaced. |
 |
The door and the chassis jig were removed to allow access to the rear face of the A-pillar which was cut away. |
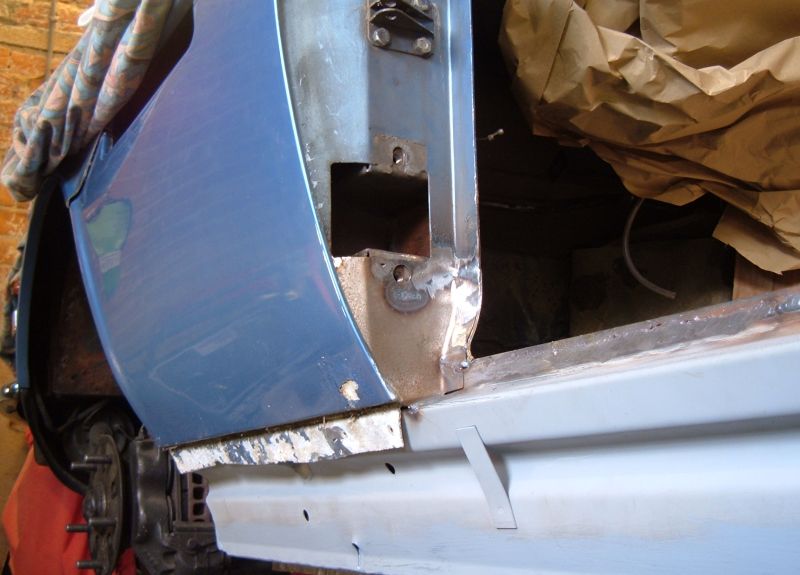 |
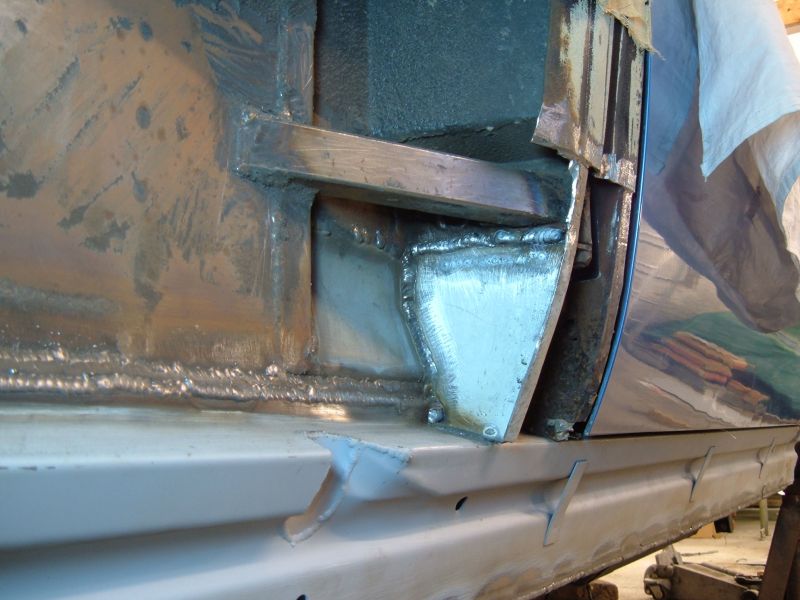
The photograph shows the replacement A-pillar inner section with the outer wing trial fitted. The rear edge of the wing is rolled over the A-pillar flange so it was pretty important that the flange ended up in the right place. |
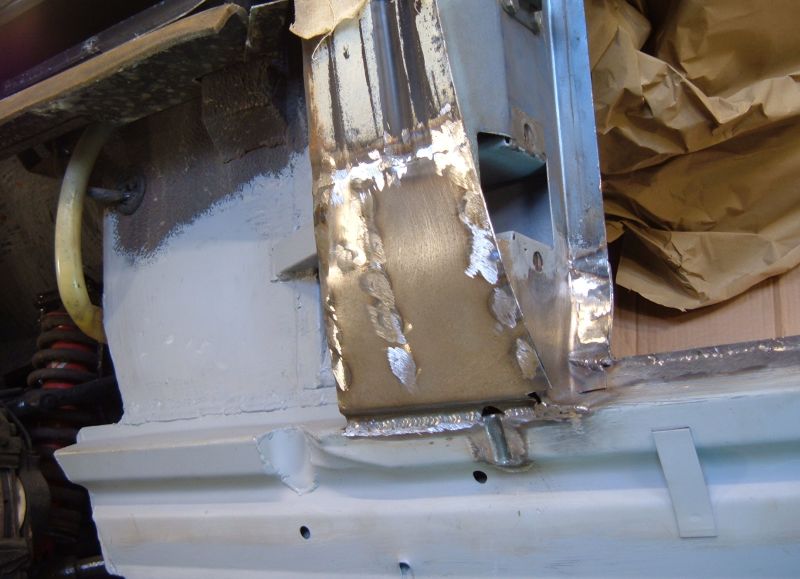 |
The outer section was the next to go on. The joint between the outer section of the A-pillar and the sill had been completely lost to rust, so there was some guesswork involved in rebuilding this area. I strayed from originality and incorporated a drain hole (visible on the outer sill below the A-pillar). I'm reluctant to build closed box sections without drain holes as a lack of venting and drainage is what caused this car to rot in the first place. |
 |
The final section to go on was the reinforcement between the A-pillar and the inner sill. |
 |
With the A-pillar completed and painted it is difficult to tell the repairs from the original structure. The hinge has been re-fitted ready for the door to go back on to the car. |
| More Aston repairs: sill welding and rear chassis and B-pillar repairs. Or back to: Aston Martin Restoration |
|